The Creation Begins with Destruction

The trailer has been re-located down next to the cabin. I've got the pressure-treated lumber to build the base. And if my motivation keeps up, I should have it framed in by the end of the summer. Hopefully.

May 7, 2011

Still at the de-Rusting

Significant rust spots get scraped with a putty knife 
and then I use this wire wheel on them.
I use safety glasses that have a magnifying reading lens in them ...
so I can see up close what I am doing.

May 1, 2011

Fighting Rust

You can see by the black overtaking the brown ...
that I am fighting the rust.
Some spots were very bad and I went at them first with the putty knife to flake off the rust scale.  Then I used a wire wheel powered by a drill to generally remove any other rust.
I've been spray painting with flat black Rustoleum.
I'm going to need at least another 4 cans.

Apr 26, 2011

Repair Work - Axle & Wheel-well

Spent yesterday morning taking the upward bend out of the front axle on the driver-side.  And hammering out the folds and creases in the wheel-well.

I hammered down on the top of that front tube ...
which brought the top of the front wheel inward - 
more aligned with the rear wheel. 

Here's what it looked like when I removed it.
This is NOT the way it is supposed to look.
So a LOT of hammer-work is involved to flatten and straighten it.

Look at all the crinkles in the metal.
This thing was in two pieces and folded up somewhat severely. 
Using a plastic hammer, I managed to straighten most of the that out. 

Although you can see it isn't perfectly smooth ...
it is flat enough that it went back into shape
and I connected the two pieces of seam back together. 

Here's what it looks like from the tire side of the wheel-well.
Lots of work hammering it "flat" on a 2 x 8. 

Zoey said it was a good thing she kept her wheel-well covers.
So I had to fix this one up.  In order to re-use mine. 

Apr 20, 2011

While I'm sanding & Painting

I'm looking at things like this materials list from the Sonoma Shanty plans that I purchased a year ago.  I'm looking at the stick-built version ... instead of buying more expensive plans.  Particularly since I don't need to run this past the Planning Commission. 

The Sonoma Shanty plans are for an 8' x 15' and I'm building an 8' x 20'
but they are really helpful.

As are the 8x20-tiny-solar-house-plans.pdf
by TinyHouseDesign.com

They don't cover plumbing, electrical wiring, cabinets, etc. I can get books at Home Depot, Lowes, or Camping World for those.  But they do help in the basics of getting it framed up and dried-in.  And give me an idea of how much of what I'll need to buy to do exactly that.

Feb 10, 2011

More Aluminum ... and Troubles to Ponder ...

There's more in the trailer ... still a bit more to clean-up.

Once upon a time ... 
a previous owner was towing the trailer behind his car
and forgot all about it being there ...
and drove around some tall hard object just like he was only driving a car by itself.  There was a mark on the siding up near the top, below the air conditioner, where a pole has scraped.  

And on the driver-side just in front of the front axle, the trailer was damaged.  This let water in to damage the wall behind the sink & stove and rot the bottom pan under the floor.


 It may have done other damage as well ...
are the wheels lined up?

Or does the one on the front axle tilt left at the top?

 
Notice that the front axle looks a bit more arched than the rear one?
That's the one that was involved in the wreck.
Just one more thing to ponder while I clean up around the trailer.

Starting to rake up all the flotsam and jetsam left from the deconstruction.

Feb 5, 2011

Scrap Metal

Cleaning up around the yard.
The top square is the aluminum roof from the trailer.
The bottom squares are the tin from under the floor.
There were several rust holes in the tin.

This is the siding - still needs cleanup.

Jan 28, 2011

Gettin' Down to the Bare Trailer

After it was all unbolted, it was still too heavy to lift the floor off by myself.  So, I borrowed a skill saw and cut the OSB flooring wood just inside the 2" x 4" frame work.  There were red chalk lines marking the framing,  along with a trail of nail-heads.  So I just guessed based on the width of a normal 2" x 4".

These are the OSB rectangles all stacked on a pallet.  
As you can see, some of them had wood-rot ...
OSB just falls apart if it gets soaked with water.

These are the sections of 2" x 4" lumber all stacked up.
The really dark ones have wood-rot.

Here we are down to the metal bottom pan.
I had to knock out the remaining side boards
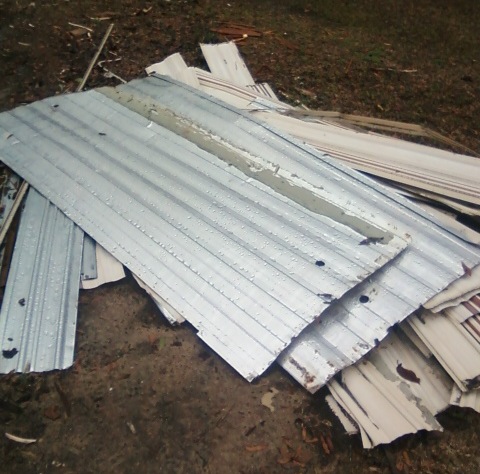
and then just rolled the thin steel up.

The steel frame is in surprisingly good shape.
This is going to require a lot less sanding than I expected.

Looking from the rear towards the front.
The very back tank is for "black water" ...
Since I will be using a composting toilet,
I will probably just remove this tank.

Next up:  
1) clean up all the junk from the yard.
2)  sell the scrap metal.
3)  Sand and prime trailer as needed.
4) Check out brakes and grease hubs.