The Creation Begins with Destruction

The trailer has been re-located down next to the cabin. I've got the pressure-treated lumber to build the base. And if my motivation keeps up, I should have it framed in by the end of the summer. Hopefully.

Oct 30, 2010

De-Construction 5 (Bathroom)

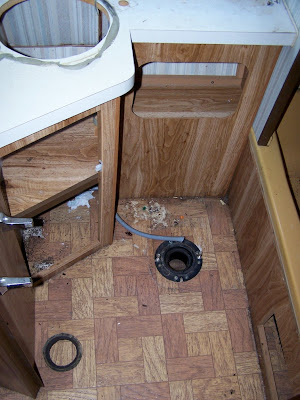
The toilet is out.

The sink & faucet are out.
This cabinet is nice, but won't fit against a straight back wall.

The cabinet doors are out.
(and so is the window)

I tried the tub ...
I could get down into it ... with my knees in the air.
But there was just no getting out of it without major help.
I think that I've gotten all I want out of the bathroom.

I'm running out of de-construction steam ...
at least for today.

Next is the fresh water tank and water pump under the bunkbed.

Oct 29, 2010

The Water Heater

This is the old water heater unit.

This is what is under the panel cover.

Here is the backside of the water heater.
This is a little 6 gallon tank.
To remove, you detach the gas line from the front panel
and the two hoses from the back panel. and then just
pull it out (this is after the removal of all 20 screws).

This may be the single most expensive item in the new tiny house.
The RV500 tankless water from Precision Temp.
This comes well packed with fragile stickers all over it ...
and the admonition to inspect it within 48 hours and report back to 
Precision Temp about any damage.
Notice the dinged corner ...

That dinged corner resulted in this bending of the white surface-mount door assembly.  I lifted it out and inspected everything.  Then reported it to Precision Temp.  But there appears to only be this cosmetic bent corner, which I straightened out.  The flange behind it wasn't bent.  And everything else seemed to be in order.

This is what it looks like from the front.  
This unit is 1" wider and 2-1/2 " taller than the 6 gallon tank unit.
If you are doing a retro-fit, you will have to make the hole bigger.

With the white cover off ... This is what the interior looks like.
On the left is the unit that the water flows through and gets heated.
to the right is the propane unit ... near the bottom is the water safety release valve.  And the drawer with the red & green LED's contains the circuit boards.

Here with the drawer open, you see the circuit boards.
In the upper right corner is the wind fan unit.

Note this label on top.  

You can add a wind protection fan unit (this can be retro-fitted).  If you use your RV where wind gusts are common such as the desert or shore areas or use your RV at high altitudes, the Wind Protection Fan is strongly recommended.  

This cold weather package (which includes the fan) -- you can ONLY get at the time of ordering the RV500.  This is due to it being factory installed.  The Cold Weather Package will protect the RV-500/501 at temperatures as low as -20°F (-29°C).  And costs an extra $110.

Here's the back left corner view.  
I'm not sure what that thing on the side is for ...
haven't read the manual yet.

Clockwise from top left .. propane line hole, cold water input line, hot water output line, and 12 VDC wires to power everything inside the unit.
Oct 27, 2010

De-Construction 4

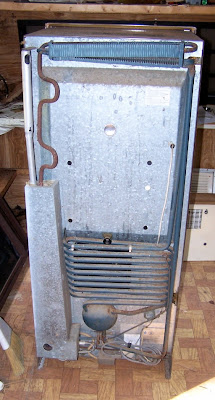
This is the outside view of the back of the refrigerator.
Here is where I disconnect the 12VDC lines, the 120VAC plug
and the copper gas line ... along with 4 screws.

The refrigerator as seen from the entire back.
when removed.

This is the outside of the water heater.
I took out all those screws & disconnected the gas line.
Inside I disconnected the two water lines.
Then I simply pulled this little 6.2 gallon tank out.

There were 4 screws around the front of the refrigerator. 
After I took those out, it still didn't want to come out.  It is HEAVY and I had to overcome inertia to get it out.  (I used a pry bar) then gently rocked it back and forth until I could ease it down on the floor. You can see the insulation that surrounded it.  Toward the back is a vertical shaft that goes up and through a screen to an outside vent.  There is actually unused space above the refrigerator for possible storage.

Look at the picture above this one and then back at this one.  I removed the insulation from around the refrigerator box.  Saw that there are screws coming from the outside, through the side wall, to hold this cabinet in place.  So I took out the screws holding the closet frame in place and removed it.  Yes, it had 50 staples along the top edge.

This is what is under the closet.
The 12VDC lines (red & white)
the 120VAC lines (black & white -- 
but mostly just appearing black here.)
the drain lines and the water lines.
And an extra group of wires from the tanks. (middle left)

Bathroom next ...

Oct 26, 2010

De-Construction 3

This is the dinette area ... now minus the overhead cabinet.

This is the sink/stove area minus the overhead cabinet.

Here is what was holding the cabinets to the ceiling ...
after removing all the screws by hand,
then using a pry-bar to wedge them loose:
Lots and Lots of staples!
(from above)

There was light in the bathroom!!
The tarp had blown off the window and skylight.

The refrigerator is next ...
(if I keep saying that - it will come true)

Oct 22, 2010

De-construction 2

The stove used to be in here.
I just disconnected the gas line and removed 4 screws
and it came right out.

There it is ...
No more kitchen sink, no stove, no cabinet.
I'll have to replace the cabinet top, but everything else was usable.
Obviously you are looking at the gas line and the plumbing.
And a water-damaged wall and damaged floor.

This was the crank that elevated the TV antenna.
Water came down that and damaged the ceiling panel.
No, it won't do me any good to save the antenna.

What you see here is after I removed the bottom-half of the 
air conditioner unit.  Now I need to go up on the roof
and remove the top-half.  My neighbor wants to buy it from me.

Next up will be the refrigerator ...

Oct 17, 2010

Deconstruction 1

All the drawers and doors are out.
The dinette set is out.  The front couch/bed is out.
I can see all the plumbing.

I've taken out all the screws in the overhead cabinets ...
and can't get them off the walls.
There must be screws coming into them from the ceiling  or sidewalls.
I found 4 screws coming into the TV stand unit, that were screwed into it from the sidewall.  Which tells me that the last thing they put on the trailer was the external metal layer.  It just makes it more challenging to save as much of the interior as I can so I don't have to buy more stuff when I build the tiny house. 

Waste not, want not.
(and save my pennies too)

And then there are these specialized wires.
It would be nice to re-use this unit.
And maybe some of all those other wires ...
I just have to expose them, trace then down,
photo-document them, and plan ahead for the future.

Oct 10, 2010

Neighbor's Old Shed

A neighbor of mine had an old shed just sitting in the side-yard.  Then one day they started serious renovation of it.  They added on a lean-to and a porch.  Then an adjacent screened in room.  (I'm sure that if there was a party or family dinner this would be great.  However, I have yet to see it in use.)  Anyway, they added some signs and a West Virginia flag and named the dirt drive, "Mountaineer Lane".  Anyway, it is now a well-used small home.  See what you think:


Oct 8, 2010

Some Interior Fotos

This is what I would like my tiny house to look like.  Because we really like the layout.  And of course, will be saving as much of this as we can for the rebuild.  We don't intend to keep the bunkbeds, but here is a view of them and what is under the bottom bunk.


This is the drinking water tank, and water pump.
To the left of this is the thermostat controlled propane heater.

I don't intend to use this heater system.

Just to the right of the bunkbeds is the bathroom.

With the tub / shower
You sit in this with your knees up in the air.

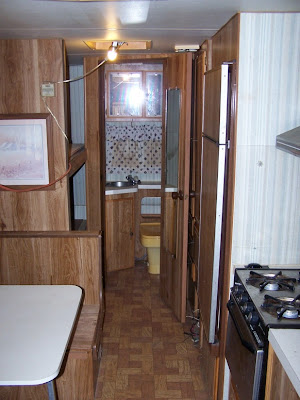
The view down the aisle to the bathroom.

With the bathroom door closed, you can see the clothes closet and a nice view of the refrigerator.  Directly under the clothes closet on the right is the miniature water heater (to be replaced by a tankless water heater).  Directly below the water heater is the converter and AC distribution panel (or should be - see all the wires).  Left of those are a few drawers.

Right of the refrigerator is the stove with oven.
I do think I'd move the window above the sink, upward a little bit.

This isn't just a kitchen sink ... this is lots of storage area!!

This is the upper section of the dining area.

The actual dining area that converts into a bed ...
and, has storage!

The couch in the front that pulls out into a bed,
with extra storage under it.
Even without a loftbed in it, this little trailer was designed to sleep 7.
I am so going to keep as much of this layout as possible.

Now that I have emptied it out ... I need to take a bunch of measurements, and as gently as possible start removing everything from inside the trailer.  While photo documenting all the hidden stuff like wiring and plumbing.